
3. Installing the Driver and Connecting
Connecting the Cables
Procedure
1. Make sure that the liquid material vat is installed.
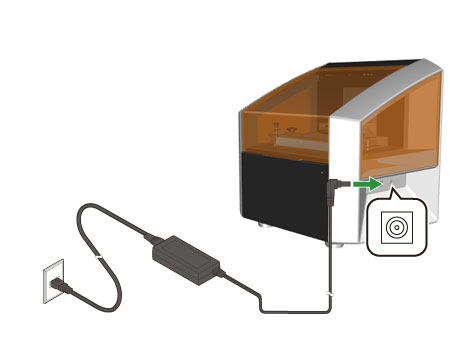
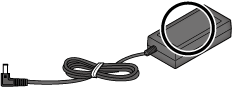
2. Connect the AC adapter to the machine.
 WARNING
Use with any other power supply may lead to fire or electrical shock.
WARNING
Use with any other power supply may lead to fire or electrical shock.
WARNING
Never use any article that is damaged.
Using a damaged article may result in fire or electrical shock.
WARNING
Use of multiple electrical loads on a single electrical outlet or of a lengthy extension cord may cause fire.
Location of Power Rating Label
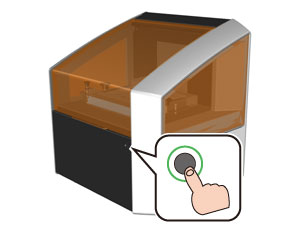
3. Press the power
button.
The initial operations start. When the green light stops flashing and remains
steadily lit, initialization is complete.
4. In the case of Windows 11
or Windows 10 version 1607 or later, check that the computer is connected to the Internet.
This makes it possible to obtain the latest version of the driver for the projector from the
Internet in the case of Windows 11 or Windows 10 version 1607 or later. For Windows 10 before version
1607, this
operation is not required.
![]() Checking the Windows 10
Version
Checking the Windows 10
Version
(Open in Another Window)
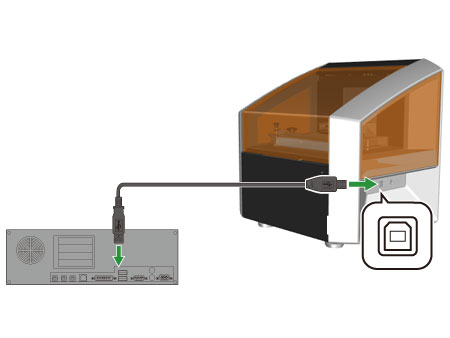
5. Connect this machine and
the computer with a USB cable.
When connecting the devices, pay attention to the points
listed below. Failure to do so may lead to the computer not being able to communicate with the machine
correctly.
- Use the included USB cable.
- Do not use a USB hub.
- Do not use a USB extension cable.
After the connection is established, the installation of the driver for the machine and the driver for
the projector starts.
Do not remove the USB cable until this procedure is complete.
6. Check whether the drivers
have been installed.
Windows 11
1. On the [Start] menu, click [Settings].
2. Click [Bluetooth & devices] - [Devices].
3. Click [Devices and printers] under [Related settings].
4. Check that the machine is displayed under [Printers] and [PJ526ABRL] is displayed under [Devices].
Windows 10
1. On the [Start] menu, click [Settings].
2. Click [Devices and printers] under [Related settings] under [Bluetooth & other devices].
3. Check that the machine is displayed under [Printers] and [PJ526ABRL] is displayed under [Devices].
Troubleshooting
If you are unable to install the driver or need to uninstall it, refer to the following:
![]() Driver for the Machine Cannot be Installed
Driver for the Machine Cannot be Installed
(Open in Another
Window)
![]() Uninstalling the Driver for the Machine
Uninstalling the Driver for the Machine
(Open in Another
Window)
![]() Driver for the Projector Does Not Operate Correctly
Driver for the Projector Does Not Operate Correctly
(Open in Another
Window)
![]() Uninstalling the Driver for the Projector
Uninstalling the Driver for the Projector
(Open in Another
Window)