3. Installing the Driver and Connecting
Installing the Driver for the Machine
Note
Do not connect the machine and the computer until you start this operation.
Be sure to connect the devices as instructed in the procedure. Failure to follow the procedure correctly may make driver installation impossible.
* If the driver is already installed, uninstall it.
![]() Uninstalling the Driver for the Machine
Uninstalling the Driver for the Machine
(Open in Another Window)
Procedure
1. Log on to Windows as the "Administrator" or as the computer's administrator.
2. Unzip the downloaded file and open the folder that is created.
3. Open the folder for your operating system.
| Operating system | Folder name |
|---|---|
| Windows 11/10 (64-bit version) | WIN10X64 |
| Windows 10 (32-bit version) | WIN10X86 |
* If you select the wrong folder, you will not be able to install the driver correctly.
4. Double-click "SETUP64.exe" (64-bit version) or "SETUP.exe" (32-bit version) inside the folder.
The file name extension (.exe) may be hidden.
5. If a "User Account Control" window appears, click [Yes].
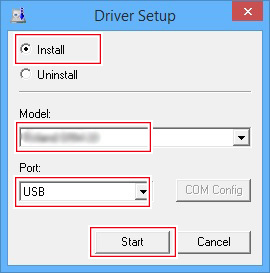
6. Click [Install], select the "Model" that you want to install and [USB] for the port, and then click [Start].
The driver installation begins. Follow the on-screen explanations to proceed with the installation.
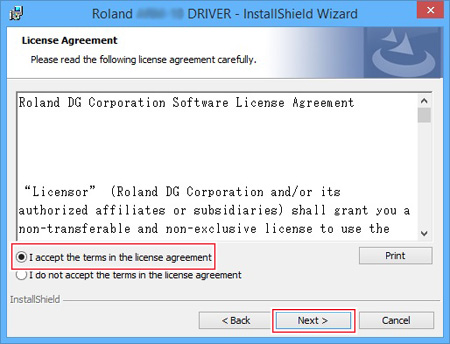
7. Select [I accept the terms in the license agreement], and then click [Next].
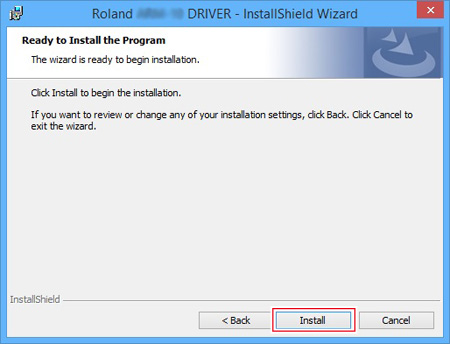
8. When the window shown in the figure appears, click [Install].
9. When the Windows security window appears, click [Install].
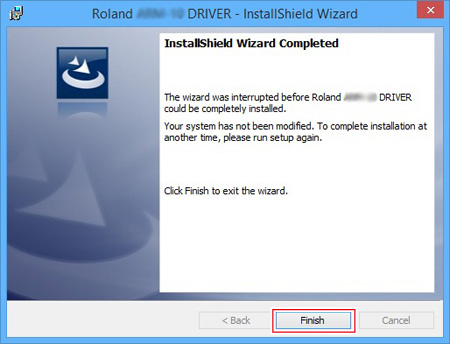
10. When the window shown in the figure appears, click [Finish].