
2. Installation
Adjusting the Angle
Required items
| Included items | Items to prepare separately | ||
 |
 |
 |
 |
| Wrench | Liquid material vat | Measuring cup | Water (200 ml) |
Procedure
1. Install the liquid material vat.
1. Open the front cover.
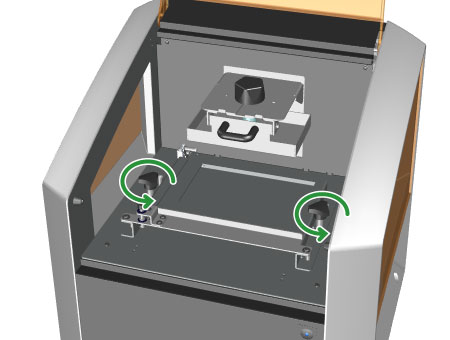
2. Loosen the liquid material vat retaining screws.
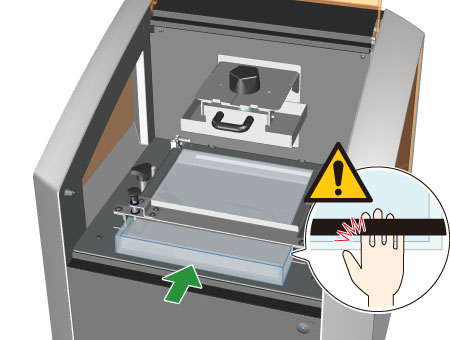
3. Insert the liquid material vat.
Take care not to get fingers caught between the liquid material vat holder and the liquid material vat.
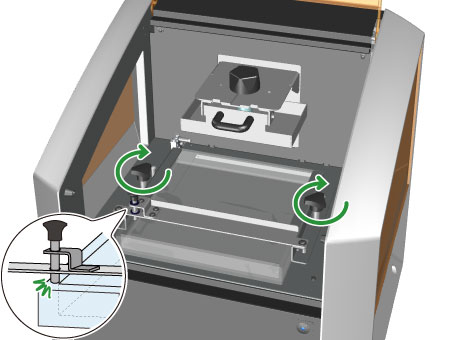
4. Fully tighten the liquid material vat retaining screws.
When doing so, verify that the liquid material vat stopper is resting on the edge of the liquid material vat.
5. Loosen the liquid material vat retaining screws one turn.

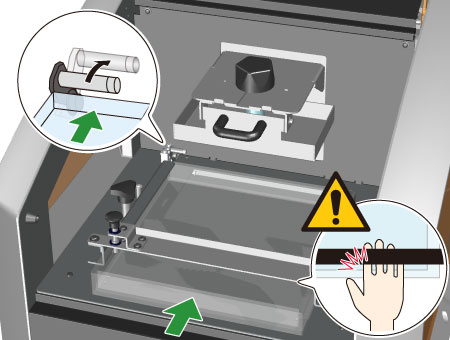
6. Push the liquid material vat in all the way.
Take care not to get fingers caught between the liquid material vat holder and the liquid material vat.
7. Fully tighten the liquid material vat retaining screws.
When doing so, check that the liquid material vat stopper is down and is touching the outside of the liquid material vat.
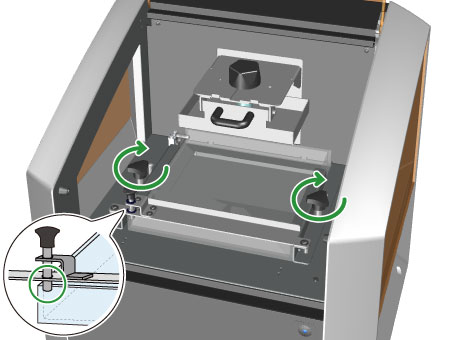
2. Adjust the angle.
1. Pour 200 ml of water into the liquid material vat. Use a commercially available measuring cup or something similar.
2. Adjust the height of the machine so that the waterline of the liquid material vat is level.
Rotate the adjuster nuts using a wrench to adjust the height. Visually check from the front, back, left, and right to make sure the waterline is level.

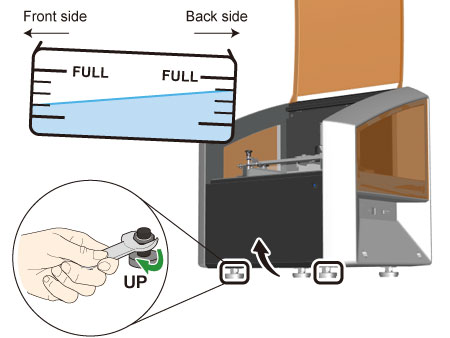
3. Increase the height of the front of the machine so that the waterline of the liquid material vat is as shown in the figure.
Rotate the adjuster nuts using a wrench to increase the height of the front of the machine so resin-based material collects at the back of the machine. If the front is too high, the object may not be a complete shape depending on its target shape and the used work area.
4. Remove the liquid material vat and dispose of its water.
Be careful to prevent the water from spilling.
5. Allow the liquid material vat to dry naturally.
Do not heat this vat or wipe it with a towel, piece of paper, etc.
6. Install the liquid material vat according to steps 1.1 to 1.7.
Note
Do not connect the machine to the computer at this time.
Be sure to connect the devices as instructed in the procedure.